In this guide, we will show you how to install a valid, commercially-signed SSL certificate on a cPanel/WHM server. This will provide verified security for cPanel services like the cPanel user login portal, WHM admin login portal, Webmail, and FTP.
First, log in to the WHM administrator interface as the root user.
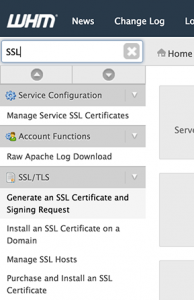
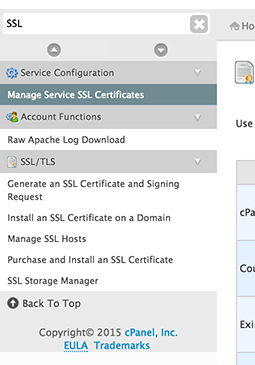
In the left-hand navigation, go to SSL/TLS, then Generate an SSL Certificate and Signing Request.
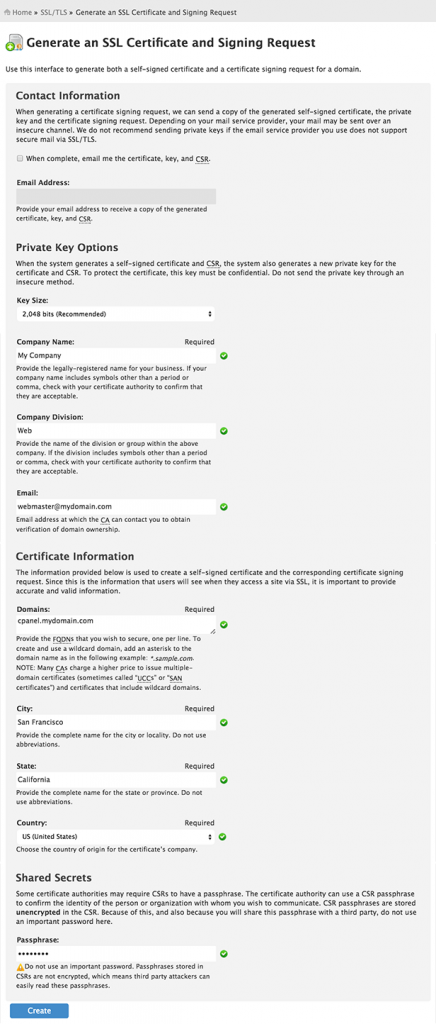
Here you will create a CSR (certificate signing request) to provide to the SSL issuer. Fill in the form like our example, using your own information:
Note: The resulting SSL certificate will secure https://cpanel.yourdomain.com. There are two important things to note:
- There must be a DNS record of type A Record pointing the subdomain “cpanel” to the IP address of the cPanel/WHM server.
- Alternately, you could secure yourdomain.com and share this SSL certificate with your public website, if both share the same IP address.
Click Create.
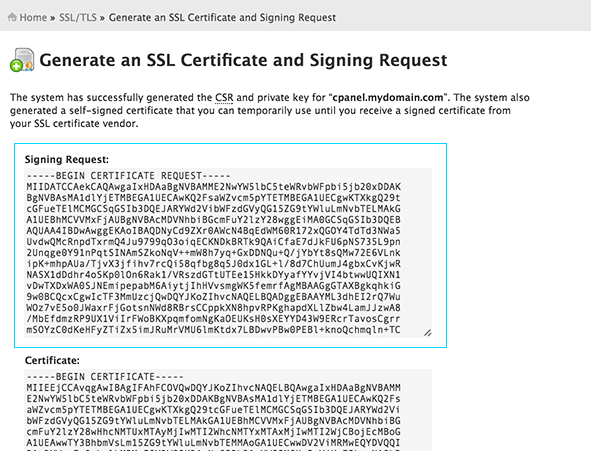
On the next page, copy the contents of the Signing Request box. This certificate request will be required by the company where you purchase the SSL certificate. If you have not purchased a commercial SSL yet, we offer them as low as $9.95 per year.
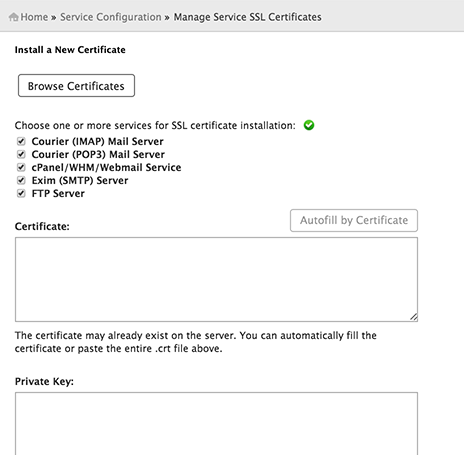
After receiving the issued certificate (.crt file) from the SSL provider, navigate to Service Configuration, then Manage Service SSL Certificates in WHM.
Scroll down to Install a New Certificate. Under “Choose one or more services,” select all of the services.
Scroll down to the box labeled Certificate. Copy in the text contents of the .crt file you received from the SSL provider. Click Autofill by Certificate to auto-populate the remaining fields.
Click Install.
Congratulations! cPanel/WHM is now secure and verified.

