Sign Up and Choose a Domain
Select a web hosting plan from: https://www.solvps.com/web-hosting/
Log in to Control Panel
You will receive an email confirmation called New Account Information containing FTP server info, and other info you might need to get started.
You can also proceed directly to the SolVPS Control Panel, where you can manage your web hosting account, find the info mentioned above, and directly log in to your web hosting services.
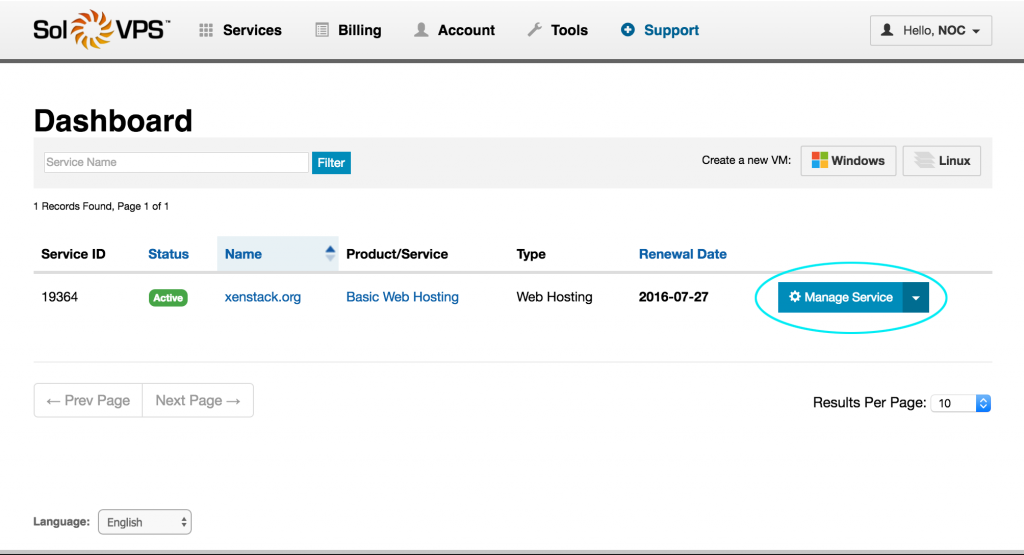
Click Services > Dashboard in the SolVPS menu (if not logged in, log in here). On the Dashboard, select your web hosting service by clicking Manage Service.
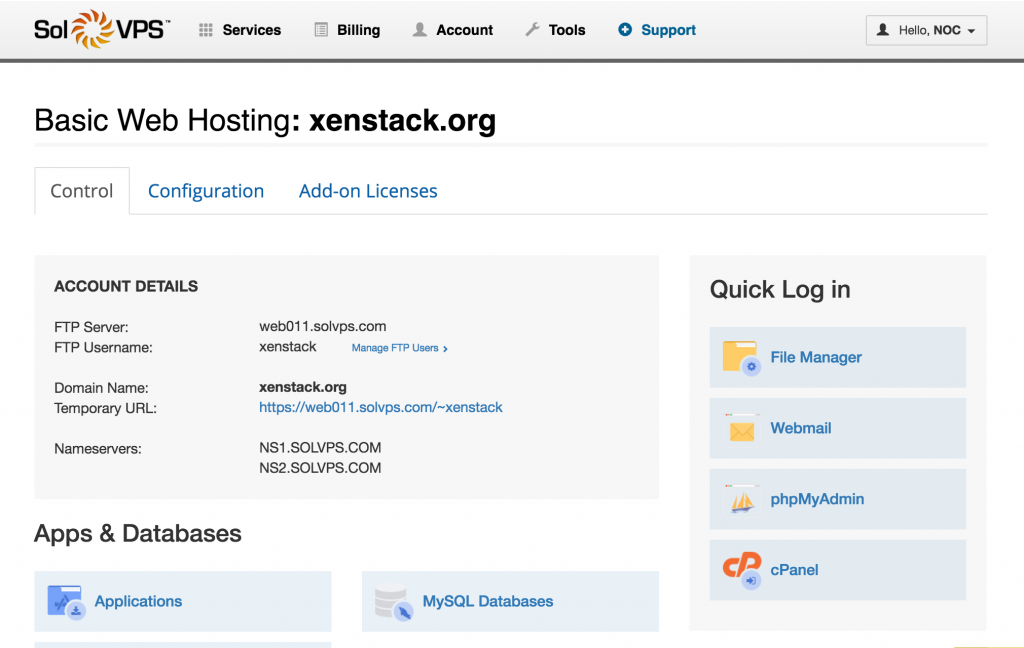
This is your web hosting account dashboard. From this page you can manage all of the features of your account. Right away you will see the FTP server access details, and quick links to key places like Webmail and File Manager.
Upload Website with FTP or File Manager
We provide two ways to upload files to your hosting account.
Upload Files via File Manager
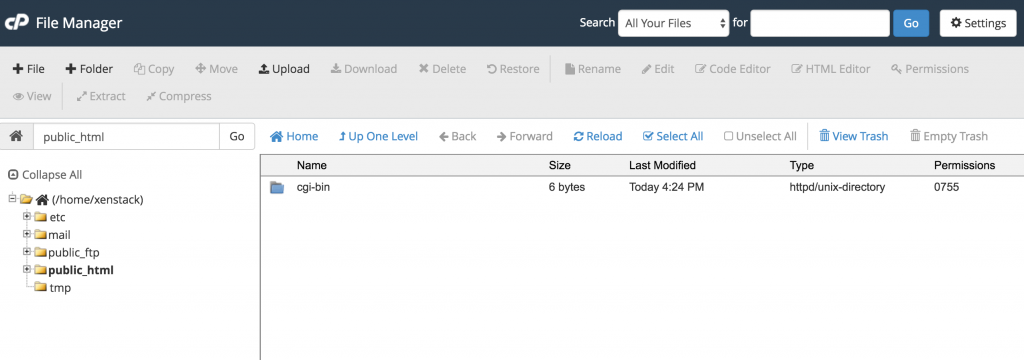
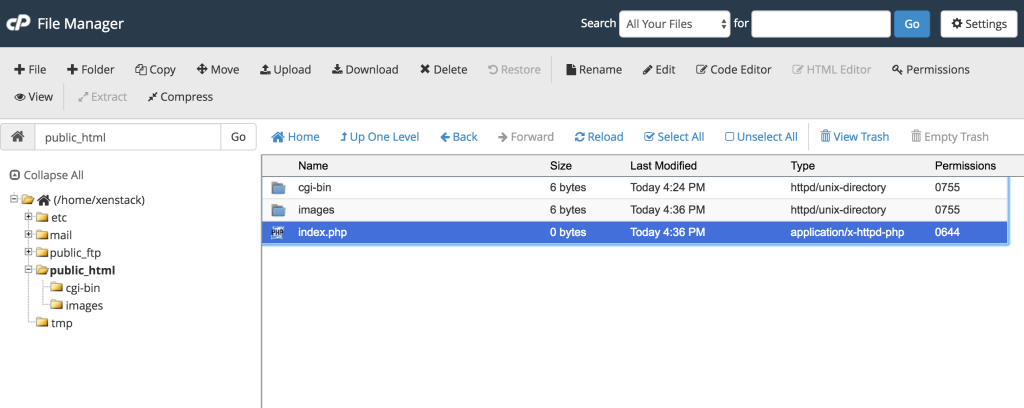
In the control panel, click the File Manager quick link. You will be directed to a web file browser where you can directly manage the files hosted on your account.
The File Manager will load inside the public_html folder by default. This folder is the default web-accessible folder, and you should put your public website files here. Use the +Upload button to upload your files.
To create a simple web page on your account, add a page called index.html or index.php to this folder.
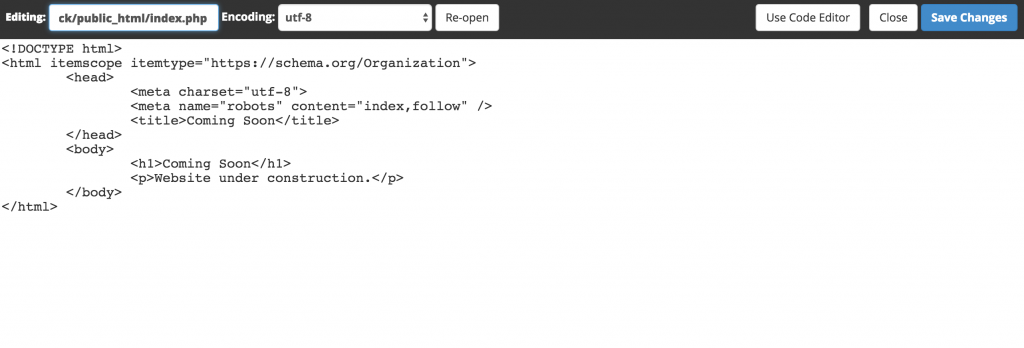
The File Manager supports editing files directly in the web interface. Use the +File and +Folder buttons to create new files. Let’s create a basic index file.
Click Save, then return to the SolVPS Control Panel and click the Temporary URL, or open a new tab and go to your domain name. You should see the index page you created in the File Manager.
Upload Files via FTP
You can also use any FTP client to connect to your hosting account and manage files. Some of the best FTP clients (and download links) are:
Most FTP clients are very straightforward and easy to use: simply enter the FTP Server, username, and password to connect. The server name and login credentials for your account are provided in the SolVPS Control Panel, and in the New Account Information email.
Update Domain Name Servers (DNS)
Registering a new domain with your hosting account will set up the nameservers automatically. However, if you chose to use an existing domain with the new hosting account, you need to update the domain’s nameservers. This is done at the domain registrar’s website (the company where you bought the domain).
Update the domain’s name servers to:
- NS1.SOLVPS.COM
- NS2.SOLVPS.COM
After this update has been completed, your domain will point to SolVPS and connect to your account hosted with us.
Note: It can take up to 6-12 hours for DNS changes to propagate around the world, so you may not see the changes take effect immediately.
Check Backups
We provide continuous, 15-minute backup checkpoints for all web hosting accounts. This is extremely useful because it allows you to:
- Restore files that were accidentally lost;
- Roll back changes that were made to a file with no backup;
- Download up-to-date backups of your entire site.
It’s good to get familiar with the backups interface, in the event that you need to quickly restore a file.
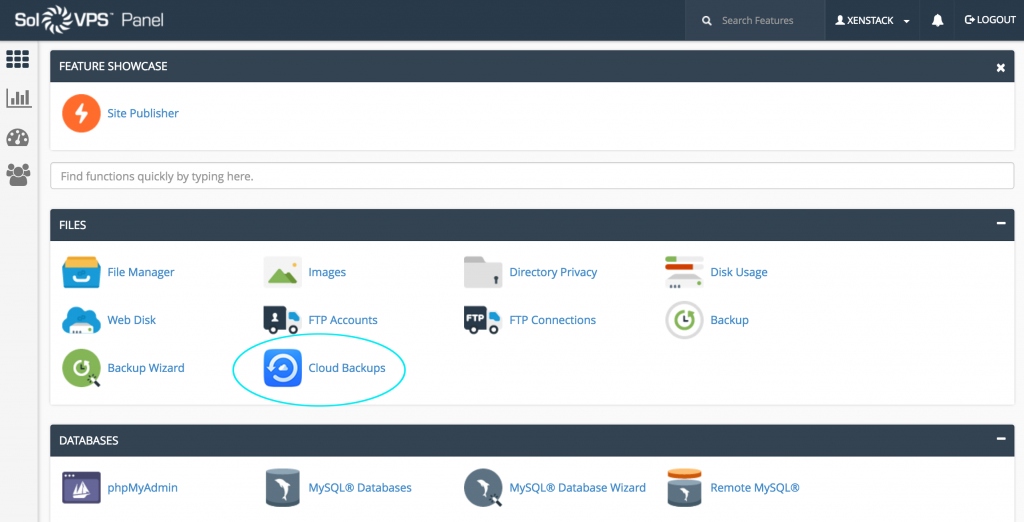
In the SolVPS Control Panel, click cPanel in the Quick Log in menu. Then look for the Cloud Backups link.
Here you will see a list of backup checkpoints going back in time. Select the checkpoint to browse.
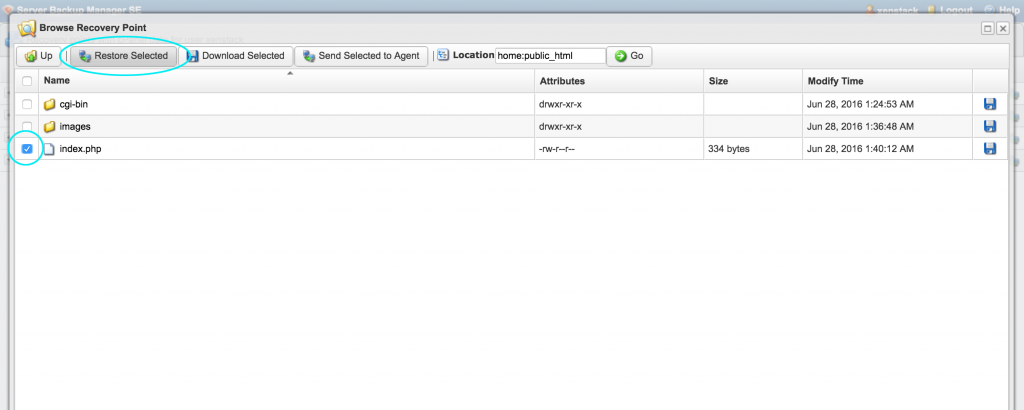
If you navigate to the /username/public_html/ folder, you will see the files backed up from your account. In this example we see the index.php page that we created earlier.
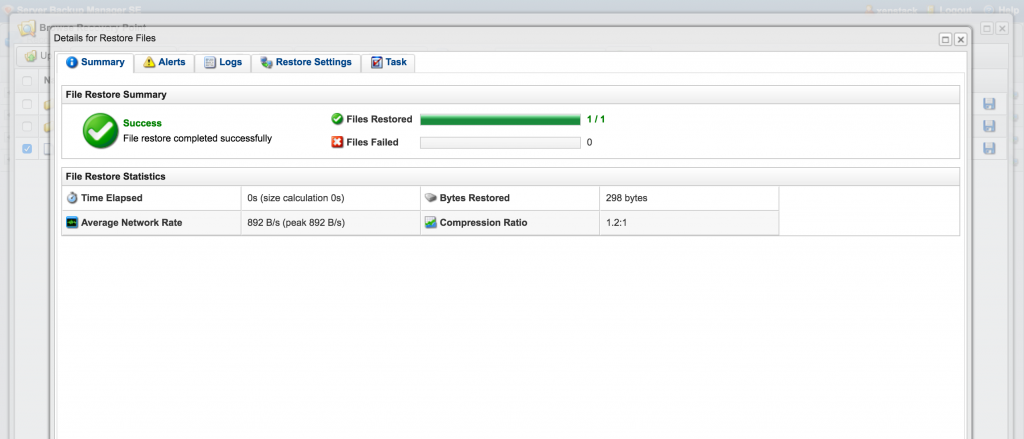
To restore this file to the version in the backup, simply select the file and click Restore.
Other Features
Use the SolVPS Control Panel and the cPanel link in the Quick Log in menu to explore all the features available in your account.
Enjoy!


