Blog

Microsoft SQL Server 2016 Now Available

We are pleased to announce that Microsoft SQL Server 2016 is now available for all hosted Windows services. Microsoft touts the new release as the “biggest leap forward in Microsoft’s data platform history, with real-time operational analytics, rich visualizations on mobile devices, built-in advanced analytics, new advanced security technology, and new hybrid cloud scenarios.”

Some of the key features of SQL Server 2016 include:

  • Up to 30x faster transactions, more than 100x faster queries
  • New Always Encrypted technology 
  • Built-in advanced analytics
  • Business insights through rich visualizations
  • Faster hybrid backups, high availability and disaster recovery scenarios 

The following editions of the new MSSQL Server 2016 are available:

  • Microsoft SQL Server 2016 Standard Edition ($15 per month license)
  • Microsoft SQL Server 2016 Express (Free license)

SQL Server is easy to deploy on a Windows VPS instance. To get started, simply choose SQL Server 2016 as an add-on for your Windows VPS service. We offer free installation and assistance for all versions of MSSQL.

Posted in Announcements, VPS Hosting | Tagged , , , , | Leave a comment

Hosting for Windows Server 2016 TP4 is Now Available!

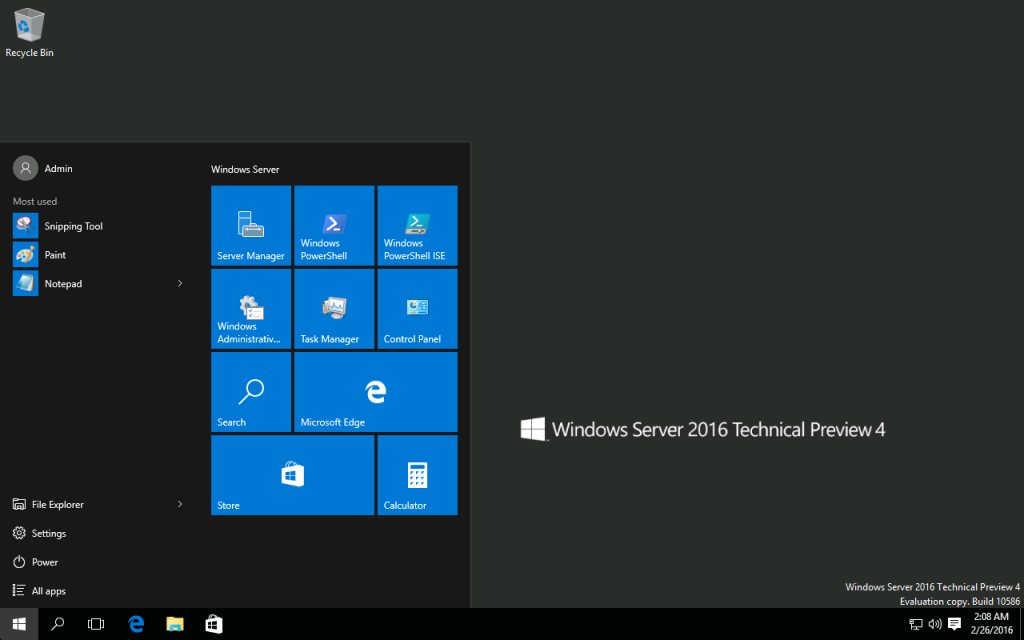
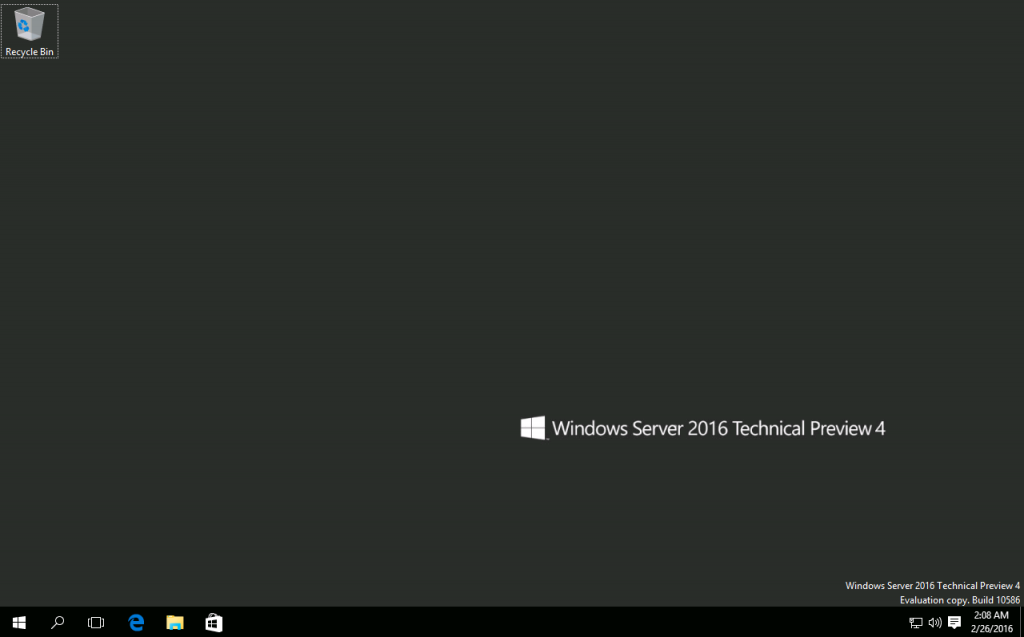
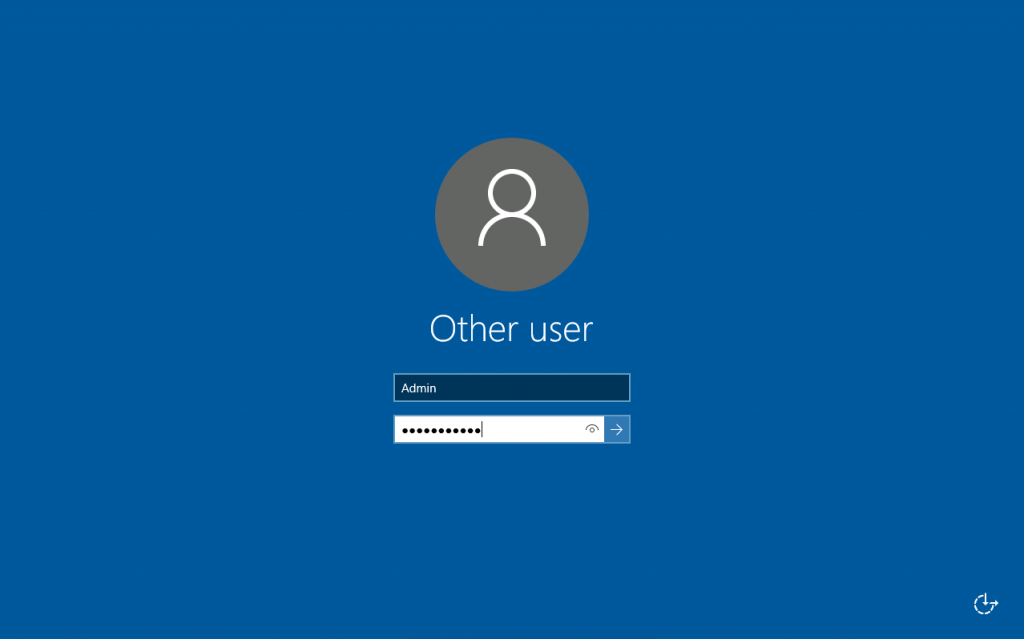
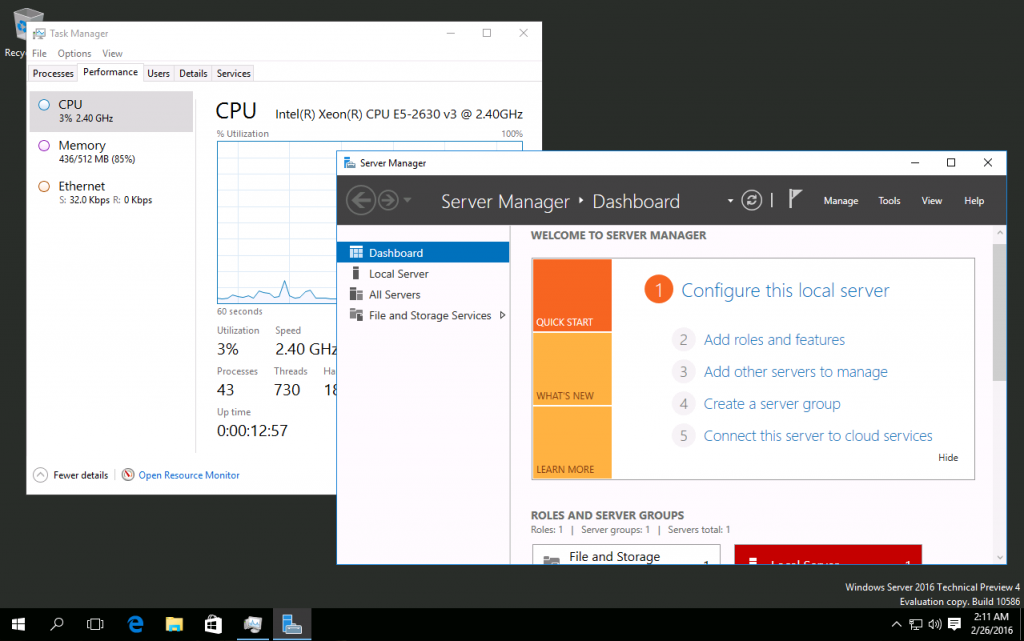
Windows Server 2016 is the latest release in the Windows Server product family, and it promises to be the quickest, most advanced release yet. Today we are pleased to announce availability of hosting for Windows Server 2016 Technical Preview 4.

Screen Shot 2016-02-25 at 6.08.24 PM

Check out some of the screenshots of Windows Server 2016 running on our Windows VPS platform, below.

The new Technical Preview 4 release is now available to install on Windows VPS systems hosted on our platform. To install Windows Server 2016 Technical Preview 4 on a VPS:

  • Existing Users: Use the Reinstall option in the VM manager control panel to select Windows Server 2016.
  • New Users: Check out our Windows VPS features and pricing.

Windows Server 2016 is currently still in development, and available for testing only prior to the official release. The demo period expires on July 1, 2016. Learn more about Windows Server 2016 Hosting on our website, or contact us to request more information.

Screen Shot 2016-02-25 at 6.07.57 PM

Screen Shot 2016-02-25 at 6.07.41 PM

Screen Shot 2016-02-25 at 6.11.24 PM

Posted in Announcements, VPS Hosting | Tagged , , , , , | Leave a comment

Installing Apachetop on a Linux Server or Linux VPS (CentOS)

Apachetop is a command line utility useful for monitoring a web server’s connections and other statistics in real time. Similar to top, apachetop reads the acces_log file in /var/log/httpd and displays the results in real time. 

How to Install Apachetop

We will install Apachetop on our CentOS system using the third-party EPEL repositories. If you are not already using EPEL, enable the repository by running the correct command for your CentOS version and 32/64-bit architecture: 

CentOS 5 / 32-bit

rpm -Uvh http://mirror.chpc.utah.edu/pub/epel/5/i386/epel-release-5-4.noarch.rpm

CentOS 5 / 64-bit

rpm -Uvh http://mirror.chpc.utah.edu/pub/epel/5/x86_64/epel-release-5-4.noarch.rpm

CentOS 6 / 32-bit

rpm -Uvh http://mirror.chpc.utah.edu/pub/epel/6/i386/epel-release-6-7.noarch.rpm

CentOS 6 / 64-bit

rpm -Uvh http://mirror.chpc.utah.edu/pub/epel/6/x86_64/epel-release-6-7.noarch.rpm

CentOS 7 / 64-bit

rpm -Uvh http://dl.fedoraproject.org/pub/epel/7/x86_64/e/epel-release-7-5.noarch.rpm

Now that you have EPEL enabled, you can install apachetop automatically via yum. 

yum install -y apachetop

Hopefully, the installation succeeds without any errors. Now you can run apachetop simply by running the command apachetop at the command line. Enjoy! 

This article applies to…

  • CentOS 7 and earlier and corresponding RHEL releases
Posted in cPanel/WHM, Guides & How To's, Linux VPS, Tech Support, VPS Hosting | Tagged , , , , | 2 Responses

How to 301R (Redirect) a URL in IIS (Windows Server or VPS)

If you’ve used Apache on a Linux server (or even a Windows server), then you are probably familiar with .htaccess and Apache directives. This article covers implementing 301 Redirects (permanent location redirects) in IIS, Microsoft’s web server.

How to Redirect a File or URL in IIS

First, log in to your server’s desktop as a user with Administrator privileges.

Open the IIS Manager application, and then navigate to the domain name you want to manage. Then, look for URL Rewrite and open the configuration pane. Copy in your previous URL, and then the new destination, and confirm the rewrite.

This article applies to IIS 7 and later running on:

  • Windows Server 2012 R2
  • Windows Server 2008 R2
Posted in Guides & How To's, Tech Support, VPS Hosting, Windows Server, Windows VPS | Tagged , , , | Comments closed

How to Force Uninstall/Removal of Exchange Server 2013 via ADSI-Edit

Warning: This procedure is not recommended if Exchange Server is intended to be installed again at any time in the future. If you have suffered a failed installation or need to remove Exchange in order to install it over again, we suggest re-installing the server and installing on a fresh system.

How to Force Remove Exchange Server 2013

We will perform the core removal from ADSI-Edit. Log in to your Exchange host server as a domain Administrator, and open ADSI-Edit.

Navigate to the following paths:

CN=Configuration,DC=DOMAIN,DC=LOCAL
CN=Services
->; DELETE
CN=Microsoft Exchange
CN=Microsoft Exchange Autodiscover

CN=Default naming context,DC=DOMAIN,DC=LOCAL
->; DELETE
CN=Microsoft Exchange Security Groups
CN=Microsoft Exchange Security Objects

Next, delete the Exchange Server installation folder from your hard drive. Locate and delete the folder:

C:\Program Files\Microsoft\Exchange Server

Next, open IIS Manager and delete both the Exchange Back End and Front End websites.


Finally, open regedit and locate the following keys to delete:

HKLM\Software\Microsoft\ExchangeServer

HKLM\CurrentControlSet\Services\MSExchange*

This article applies to Exchange Server 2013 running on:

  • Windows Server 2012 R2
  • Windows Server 2008 R2
Posted in Guides & How To's, VPS Hosting, Windows Server, Windows VPS | Tagged , , , , , | Leave a comment

How to Change the PHP Handler on a Linux Server or VPS with cPanel

This article covers how to change the PHP handler on a Linux VPS or dedicated server running cPanel/WHM. The instructions below require root-level access to the WHM admin panel.

The PHP handler is the software that Apache uses to implement PHP. The different choices can have effects on the performance, and security, of your server. For more information about the specific differences and capabilities of suphp, dso, and cgi, please see cPanel’s official documentation: https://documentation.cpanel.net/display/ALD/More+about+PHP+Handlers

How to Change the PHP Handler

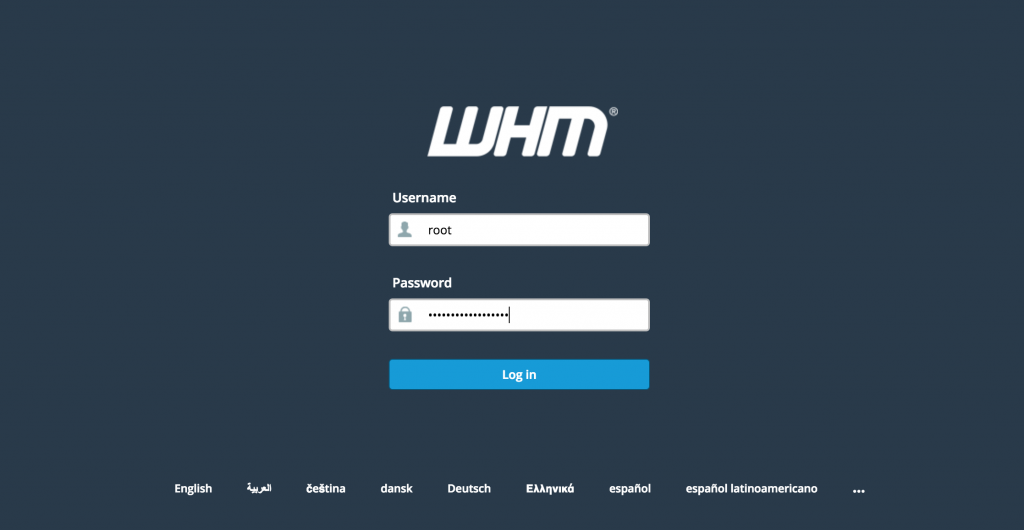
1. Log in to WHM as the root user.

Screen Shot 2015-12-16 at 10.15.54 PM

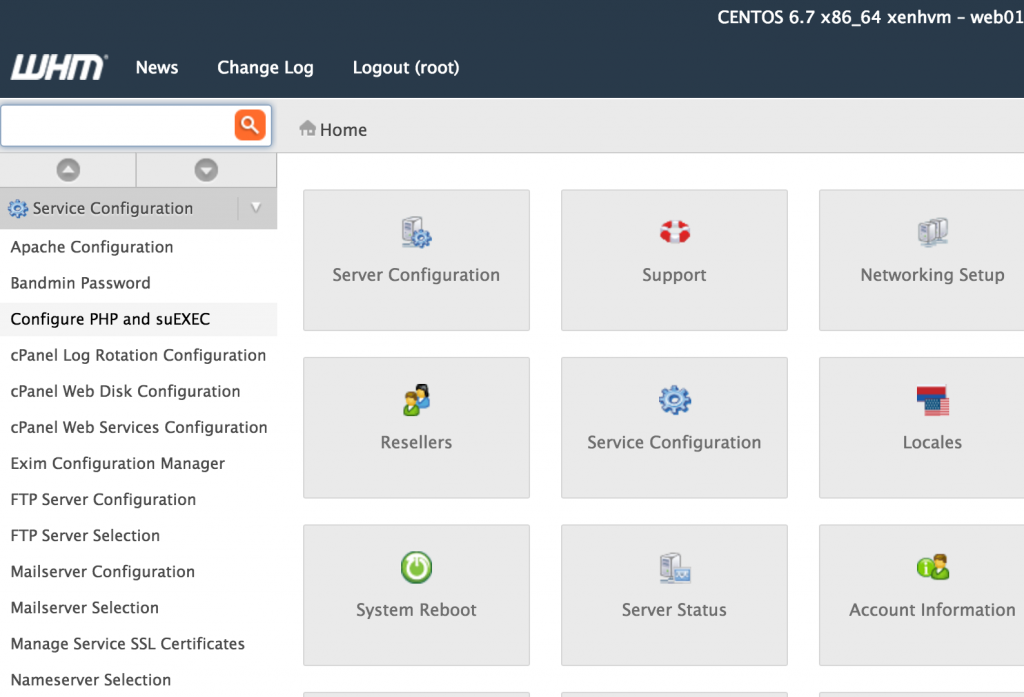
2. Navigate to Service Configuration > Configure PHP and suEXEC in the left menu.

Screen Shot 2015-12-16 at 11.14.20 PM

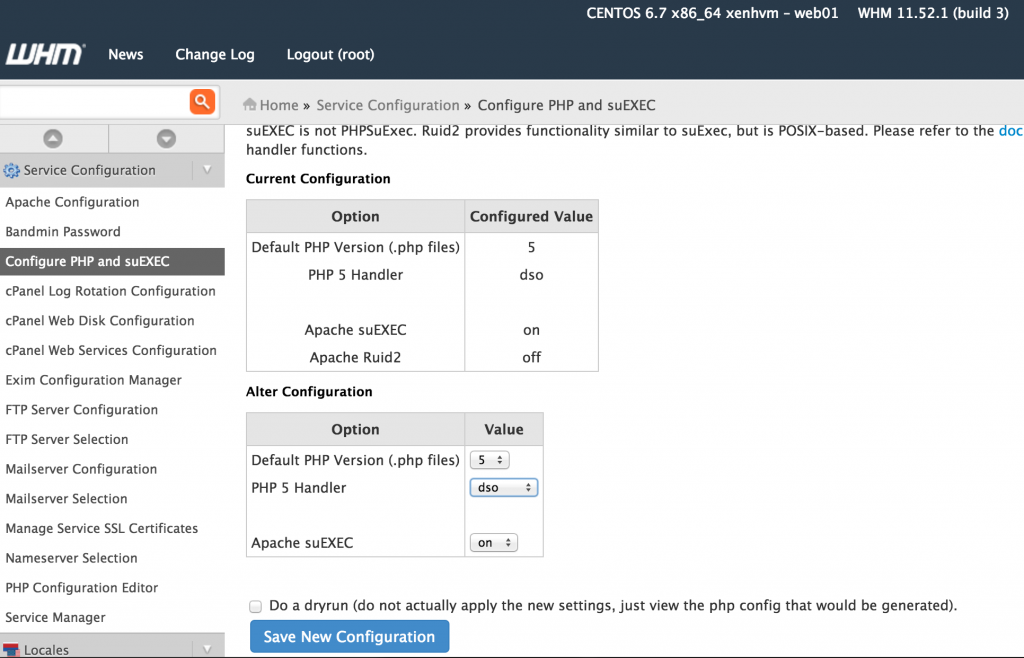
3. Scroll down to Alter Configuration and choose your preferred PHP handler: suPHP, DSO, or CGI. Click Save New Configuration to commit the change.

Screen Shot 2015-12-16 at 11.16.39 PM

This article applies to CentOS Linux servers running WHM/cPanel.

Posted in cPanel/WHM, Guides & How To's, Linux VPS, VPS Hosting | Tagged , , , , , , , , | Leave a comment

Enable SSL or Change a Certificate in Exchange 2013 Management Shell

Perhaps you have had the unfortunate experience of getting locked out of OWA and ECP due to SSL problems, after configuring a new SSL certificate. Or, maybe you want to change the Exchange server SSL certificate via management shell.

How to Enable or Change a SSL Certificate in Exchange 2013

Use the Exchange Management Shell to change the certificate. First, log in to the Exchange Server host system and open Exchange Management Shell.

Run Get-ExchangeCertificate to list all the available certificates on the system.

Get-ExchangeCertificate

Then, after finding the certificate you want to activate, run Enable-ExchangeCertificate as below to switch to the designated SSL certificate:

Enable-ExchangeCertificate -Thumbprint 5113ae0233a72fccb75b1d0198628675333d010e -Services POP,IMAP,SMTP,IIS

After successfully completing the change, run iisreset to restart IIS.

iisreset

This article applies to Exchange Server 2013 running on:

  • Windows Server 2012 R2
  • Windows Server 2008 R2
Posted in Guides & How To's, VPS Hosting, Windows Server, Windows VPS | Tagged , , , , , | Leave a comment

Reset/Change the MySQL Root Password on a cPanel Server (Linux)

On a Linux server or VPS with cPanel/WHM, there are two ways to reset the root password for MySQL. One method uses the WHM admin web panel, while the other uses the command line (shell).

Reset the MySQL root password in WHM

On servers with cPanel/WHM, it is recommended to change the MySQL root password via WHM. Follow the instructions below to change the MySQL root password in WHM:

1. Log in to the WHM admin interface at: https://cpanel.yourserver.com:2087 (Using your server’s hostname or IP address.)

Screen Shot 2015-12-16 at 10.15.54 PM

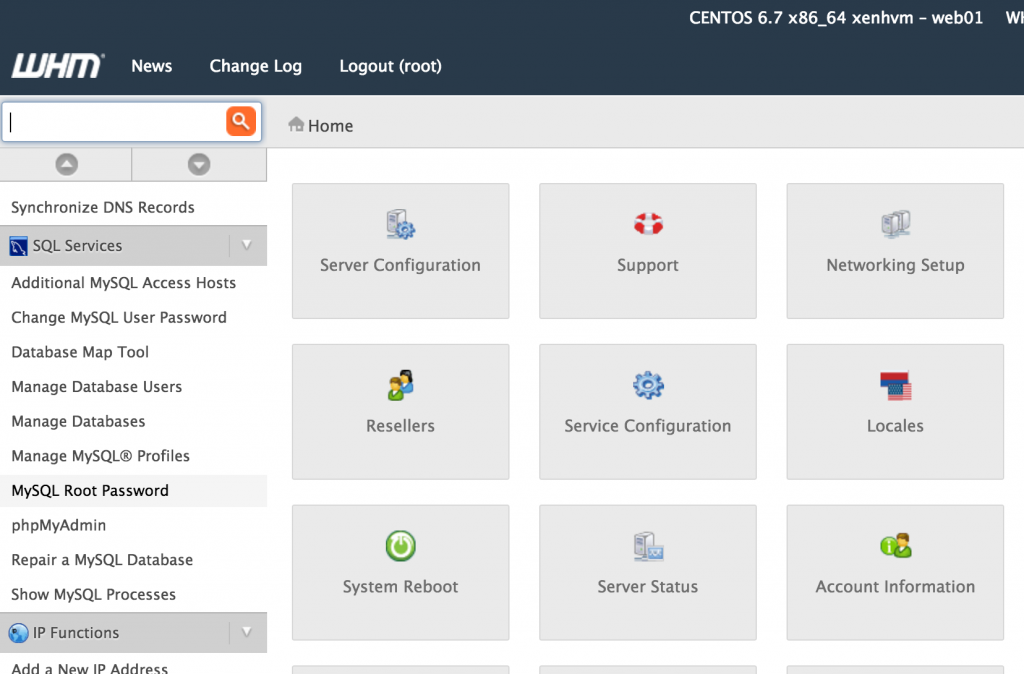
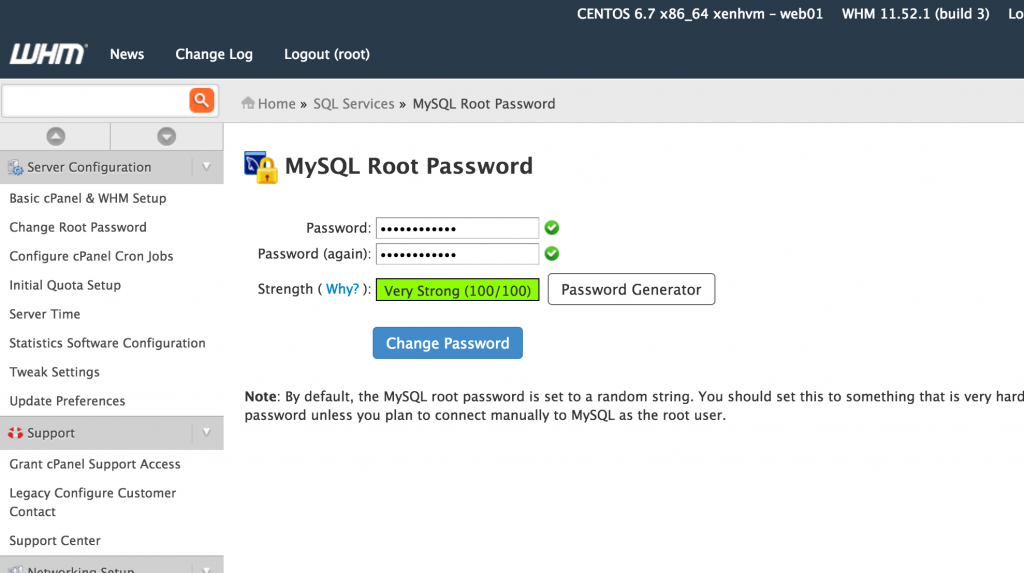
2. Look in SQL Services > MySQL Root Password.

Screen Shot 2015-12-16 at 10.15.25 PM

3. Choose a secure password and commit the change. That’s all you need to do!

Screen Shot 2015-12-16 at 10.16.19 PM

Reset the MySQL root password via SSH

To change or reset your server’s MySQL root password via SSH command line, follow the steps below:

1. Connect to your server via SSH as the root user.

2. Stop the mysqld service by running the command:

/etc/init.d/mysql stop

3. Run the following commands as shown:

mysql -u root
mysql> use mysql;
mysql> update user set password=PASSWORD('yourpasswordhere') where User='root';
mysql> flush privileges; 
mysql> quit


Posted in cPanel/WHM, Guides & How To's, Linux VPS, Tech Support | Tagged , , , , | Leave a comment

How to Start a Program at Startup in Windows & Windows Server

There are two common solutions to start a program automatically after the server reboots: use Task Scheduler, or make the program start as a Windows service at bootup. These solutions work for some situations when the program you need to start only needs to run as a background (unseen) process. In this article, we will address how to automatically log in a user and launch a GUI program when the system reboots.

How to Automatically Launch a Program on Startup

First, download a Microsoft provided program called Autologon.exe

After extracting the .zip, run Autologon.exe and enter the credentials for the Windows user you are currently using (for example, Administrator). Click Enable. Now, the Administrator user will log in automatically after the system is rebooted.

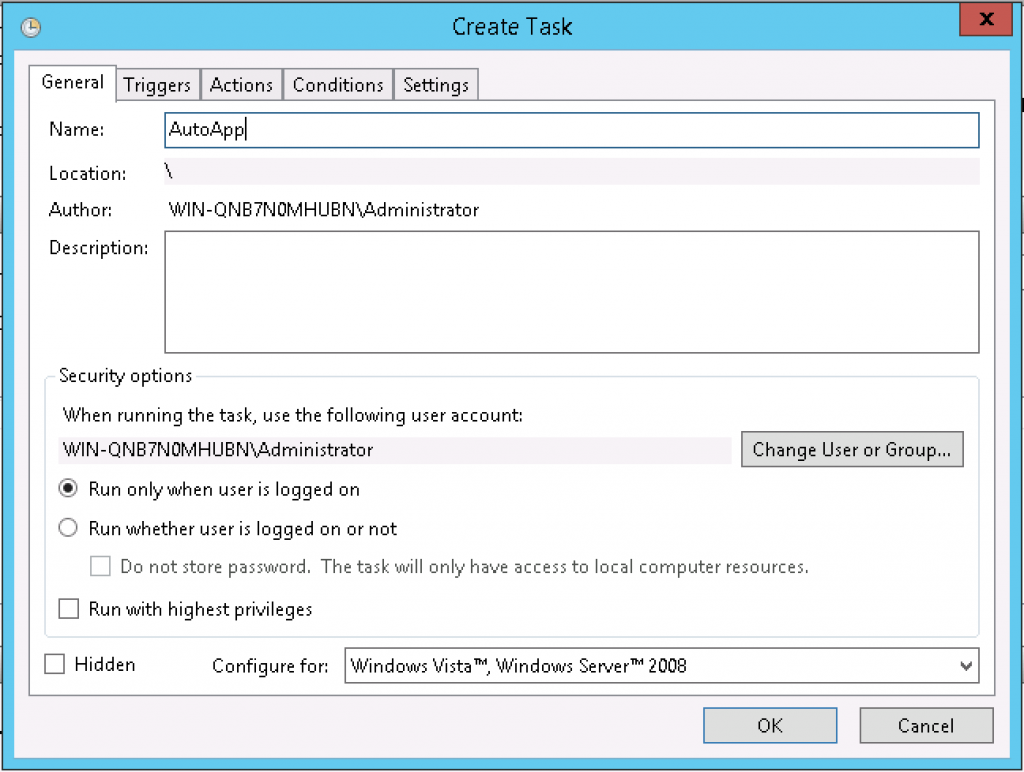
Next, open Task Scheduler, and click Create Task… in the right-hand menu. Fill in each of the settings tabs with the options below. In the third tab Actions choose the .exe program you want to run automatically:
 Screen Shot 2015-12-13 at 7.16.24 PM

 General Tab: Fill in a name. Select “Run only when user is logged on.”
Screen Shot 2015-12-13 at 7.20.34 PM

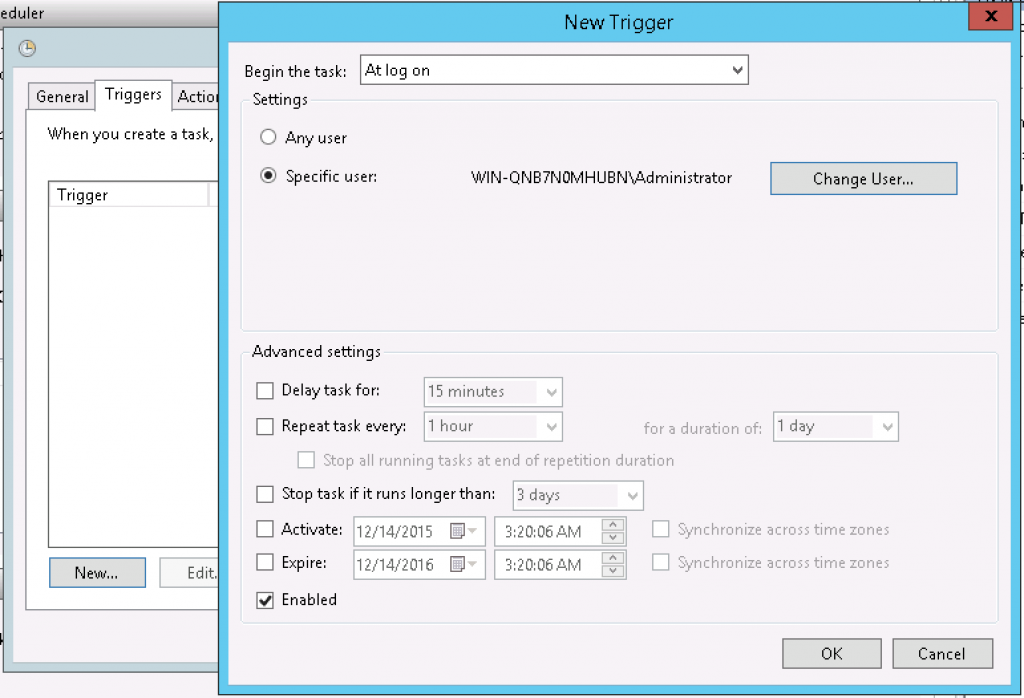
Triggers Tab: Click “New…” and then select Begin the task: At log on. Set it to Specific user: and then choose your user (Administrator). Click OK to save the trigger.
Screen Shot 2015-12-13 at 7.21.55 PM

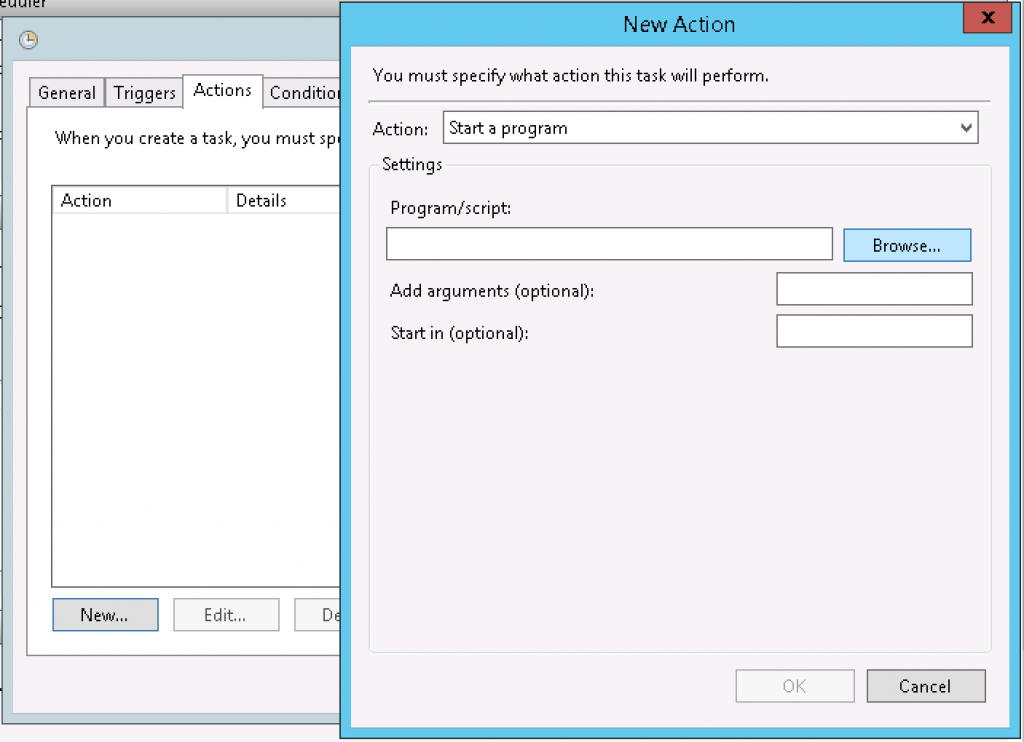
Actions Tab: Click “New…” and then select Action: Start a program. Click “Browse…” and browse to the .exe file of the program you want to launch automatically.

The last 2 tabs should remain with the default settings. Click OK to save the new task!

Now, create a second task. This time, we will use exactly the same settings to launch a Windows service. This will disconnect the user from the local desktop after your program is launched, while leaving the user account running and open to access via Remote Desktop Connection or another login.

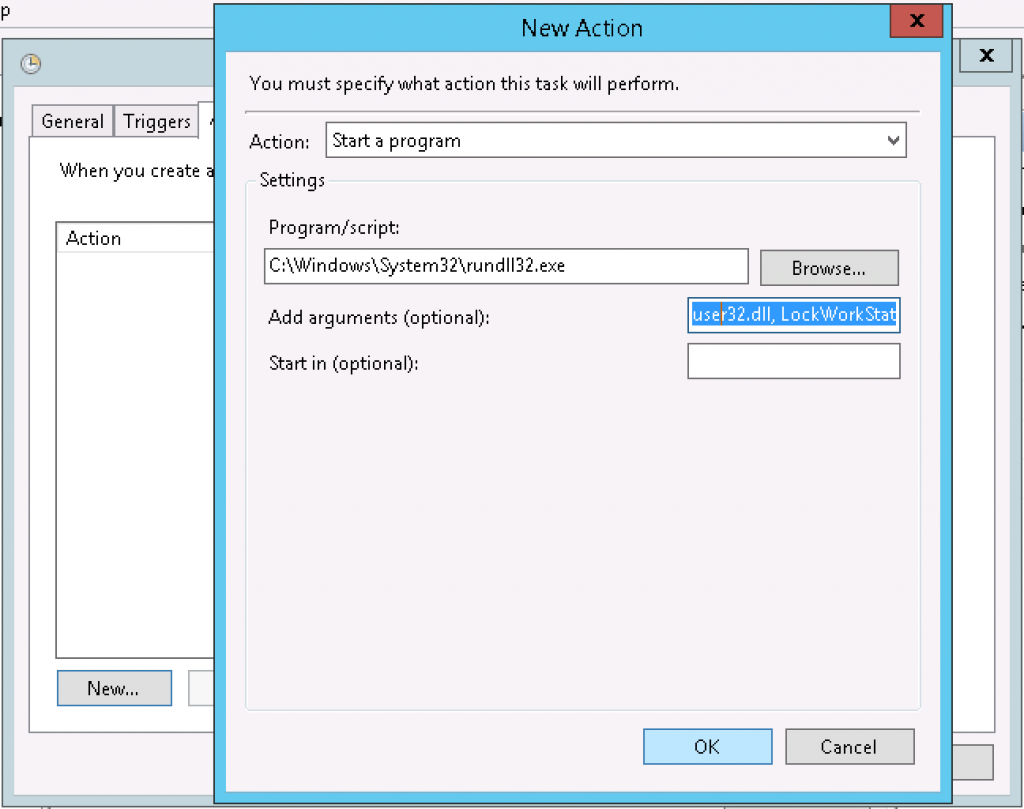
Use all of the same settings for this task as the previous one, but choose the program C:\Windows\System32\rundll32.exe, and fill in Add arguments (optional) with “user32.dll, LockWorkStation”.
 Screen Shot 2015-12-13 at 7.43.02 PM

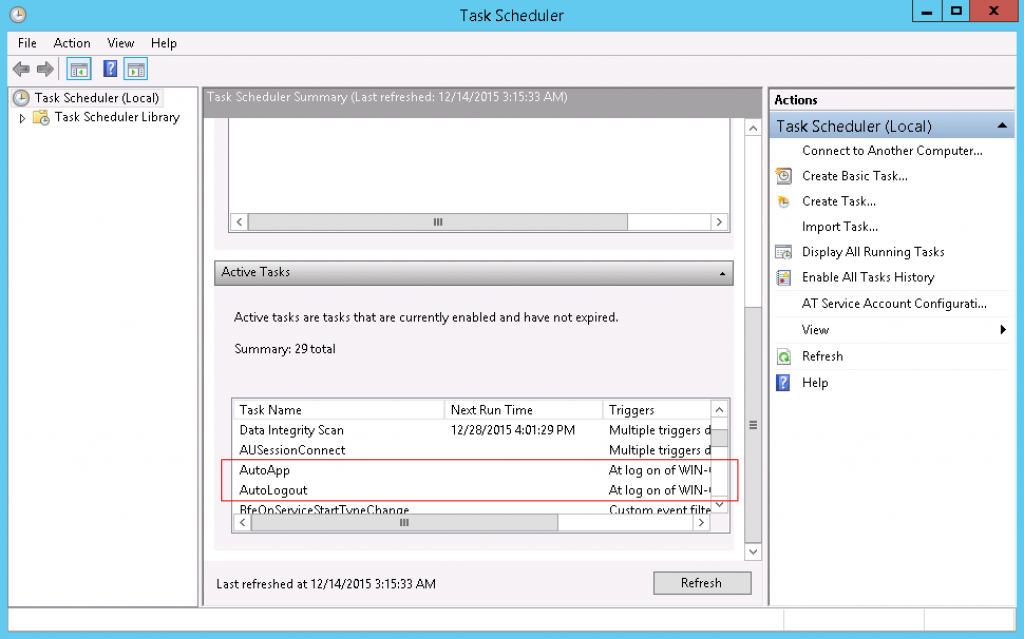
Click OK to save the second task. Now you should have 2 new tasks in Task Scheduler, which you can find under Active Tasks in Task Scheduler:
Screen Shot 2015-12-13 at 7.41.13 PM copy

Confirm the configuration by rebooting your server. Next time you connect with Remote Desktop, or via the local terminal, the program should be open and running.

Note: You can repeat the first task as many times as you need, if additional applications should be started automatically.

This article applies to any Windows system, including:

  • Windows Server 2012 R2, 2008 R2, 2003 R2
  • Windows 10, 8, 7, Vista, XP

The walk-through above was performed on Windows Server 2012 R2.

Posted in Featured Guides, Guides & How To's, Tech Support, VPS Hosting, Windows Server, Windows VPS | Tagged , , , , | 1 Response

“Failed to Fetch: 404 Not Found” Errors in Ubuntu apt-get

On recent versions of Ubuntu, you may get the following error when trying to run apt-get update or apt-get install: 

Failed to fetch 404 Not Found

Usually, the reason for this error is changing locations of Ubuntu repositories. According to the versioning policies of Ubuntu, normal releases are supported for 9 months, whereas LTS (Long Term Support) releases are supported for 5 years.  After the support period has expired, the repository is moved to another server and will no longer be available in the standard location.

Solution

The best solution to this issue is to upgrade the Ubuntu version, which will update sources for apt-get as well. To update, run the command:

sudo apt-get dist-upgrade

If you prefer not to update, or cannot update the system for another reason, then it is also possible to update the file /etc/apt/sources.list. To use this solution, you should already be familiar with choosing custom repositories.

Applies to:

Posted in Guides & How To's, Linux VPS, Tech Support | Tagged , , , , | Leave a comment


Questions? We're here to help.